
I'll start with the pages I've been making for my brother's wedding. I started out with this layout from Make It From Your Heart Volume 2, retired Ivy Lane papers, retired Swirls Around stampset, retired Ivy Lane stampset, Happy To Be Friends stampset, multiple inks, and retired Ivy Lane complements. Just because items have been retired doesn't mean I don't use them. I bought em, paid good money for em, I'm gonna use em!

 |
| Inks used: blush (retired, replaced with pixie), bamboo, smokey plum, sweet leaf, slate. |

Next is my entrance with my groomsman Dex. As we are the first couple down the aisle, we get our own page. ;) I used a layout from Scrapbook Generation for this one. I also used a mix of retired items (Skylark paper packet and blush ink) and current items (colonial white cardstock, kraft cardstock, heart vine and quatrefoil embossing folders, multiple inks) for this layout. The wedding colors were purple, gray, and accented with burlap so using a blue and green paper packet is a bit challenging!


 |
| Happy To Be Friends stampset wreath stamped in sweet leaf, flowers stamped in blush, slate, bamboo, glacier, and smokey plum. I love this effect! |
 |
| I kept the embossing folders to 2 designs and used the Chocolate squares as photo mats. |
 |
| Julia's flower is in blush (retired color) and Evan's flower is in glacier (new color). |

For the rest of the bridal party, I squished em all onto the same page, just because I can. ;) Another Scrapbook Generation sketch, Skylark papers, quatrefoil and woodgrain embossing folders and inking up the embossed bits. I'm really enjoying the collage pages from Scrapbook Generation!


I've started the page for my new sister's entrance and haven't printed the pictures (yet). I'll hopefully get this layout done this week.

A couple weeks back I got these wooden letters from spotlight and covered them using Hopscotch paper and liquid glass. I finally got around to sticking them up on my office wall with good old blutack!

I decided to challenge a new mate to a color challenge the other night using these colors.


One of the facebook groups I'm in is doing page challenges. This is one of the current challenges from Make It From Your Heart Volume 1. I've embossed the purple strip with our Damask embossing folder. Not sure which wedding photos I'll use on it yet. The mint bit is a place holder for a 5x7 photo so I don't forget.

I'm toying with ideas for save the date cards. This is the idea that popped in my head the other night. If you're getting married soon and are looking for unique save the dates, invites, or thank you cards, I can help whip up something that suits your taste and colors. With a palette of 42 colors (including 2 shades of white), and a mix of alphabet stampsets, the options are nearly endless.

And finally, the layout I finished yesterday before heading to the pool for a looooong soak. This is for formal wedding party shots, it's also another scrapbook generation sketch.


 |
| I decided to add some hearts in smokey plum, sweet leaf, bamboo, desert sand, and glacier inks. |
This is the layout design I'm teaching in February's Scrap Your Stash sessions. I did it first in Heartstrings, then in Ivy Lane as I loved it so much! There's space for 12 photos on this layout. 12!
 |
| 12 photos spaces: four 2x2, one 4x6, five 3x4, two 3x5. |
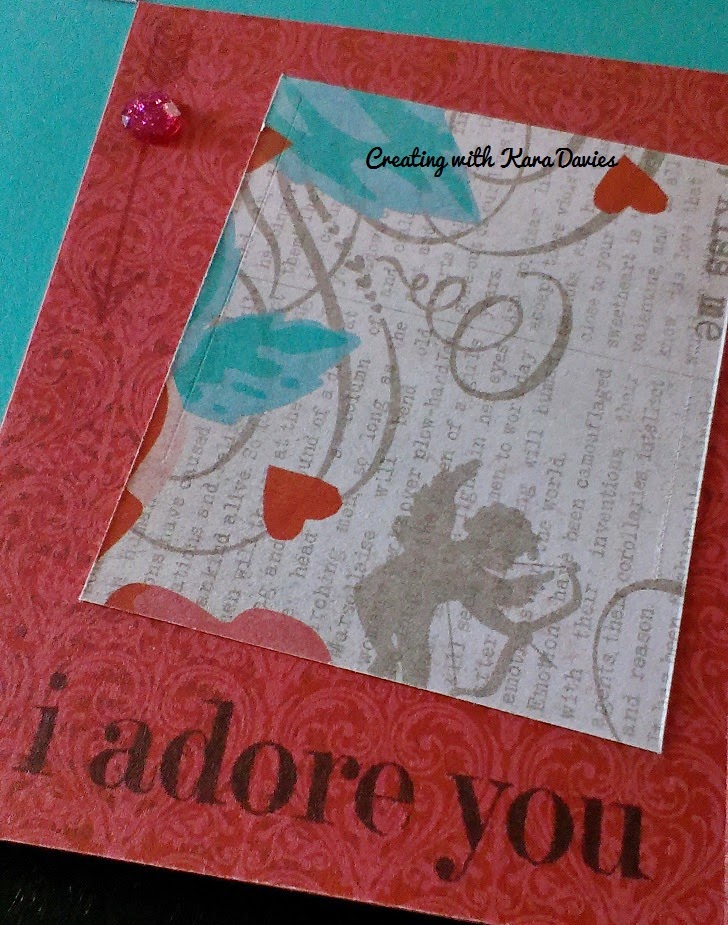 |
| I stamped this one with the Year Noted arrow stamp in ruby ink and i adore you (retired stamp) in black. |
 |
| Love You is from Happy To Be Friends and I stamped it in blush. |
 |
| Heart embossing folder, and lagoon inked edges. |
 |
| Space for 12 photos, yes 12! |


Love this 12 photo layout? Want to know how to make it? Guess what, I'm teaching them during Scrap Your Stash! Want to come to a Scrap Your Stash session? Let me know!

No comments:
Post a Comment
All comments must be approved before they are visible. Abusive comments or spam of any sort are not allowed.