Showing posts with label pocket scrapbooking. Show all posts

Monday, June 27, 2022

June Sleep at Home Camp

This weekend was our first Sleep at Home Camp for 2022. It landed on the same weekend as Women's State of Orgin and Men's State of Origin Game 2 so I threw out the idea of putting an Origin theme to the group. Off we went!

I made up a QLD layout for camp and offered it as a preorder.

I also made up this Craftiness is Happiness layout and offered it as a preorder.

Friday afternoon, we packed up my goods and headed over to the venue to set it up to our liking.

One of my customers runs, owns, operates, and manages a string of childcare centers in the area. She graciously allows us use of the Kindy Room for our weekend events. We call it Adult Day Care.

We had a lot of very concerned and curious little noses pressed against the windows watching us. They kept asking their caregivers "what are they doing!?" We moved it all around so we can set up our tables and chairs to fit our needs. I ended up with an L-shape of tables and it worked out really well!

For our regular retreats, we do a welcome project name tag on the first night. Since this was a 2 day camp, we did these after morning tea on Saturday. I also had our 2022 Virtual Convention happening this weekend. In my box of Convention goodies, Sticky Girl was a stowaway! I put her to work with jumping on our name tags.

Some ladies stamped her in Cinnamon and decked her out in a variety of Queensland maroon and gold. Others went the Carolina route and turned her into a NSW blue!

For morning tea, I made a fresh batch of lemonade scones with strawberry jam and vanilla cream. They were devoured!

I saw a sale on vistaprint a few weeks back for custom mugs. I ordered one for the four of us in our appropriate colors. #IYKYK

Unless yo face is on my mug, you don't get to use it!

We set up our full shop of goodies along one wall for the ladies to shop as they wished throughout the weekend.

The kindy room has a microwave and fridge to use. We bring a kettle and poof, we have all the catering facilities we could possibly need!

The campers in full swing getting their tables sorted out and projects started. We love Sleep at Home Camps! We get a table to ourselves and all the fun of a regular camp, yet we get the comfort of our own beds at night. It's also drastically cheaper for all involved so we try to hold at least one a year.

After doing the scones and nametags, I had a chance to get my own projects started. I had a layout kit preorder to put together and some more thin cuts to use for another kit.

I used the Slim Alphabet Thin Cuts to cut out my title from Kraft and Black cardstocks. Pro tip: back your cardstock with our new Adhesive Sheets first, then run through your diecutting machine.

Since I forgot my adhesive sheets, I went the more fiddly and time consuming direction... using tweezers and liquid glue.

This turned out better than I thought it would!

I set my Black letters down first on wonky angles, then the Kraft letters on top to create a drop shadow effect.

When the Fresh Paint paper has so many colors in it, a drop shadow is the best way to make your title stand out.

Since this is a Sleep at Home Camp, we order in pizza for dinner. A quick look through the Domino's menu showed mini pizzas available. I ordered a mini Three Meats for my dinner. After dinner, we had a white chocolate and raspberry GF blondie for dessert and kept crafting til 10pm before heading home to get some sleep.

We got up and arrived at the venue all set to start again at 9am. Our ferocious taskmaster Matilda the cleft Moodle kept us all amused with her explorations and antics. She's a cleft puppy being cared for by her vet nurse (one of my customers) and came to craft with us. It was a big weekend full of new sights, sniffs, cuddles, naps, feeds, and more. We wore her out! Once she's big enough for her cleft surgery and recovered, I believe she'll be available for adoption.
Honestly, how do they expect us to work in these conditions?!

It's tough work being a puppy!

I double thin cut my title for this layout too. I opted for the Block Alphabet Thin Cuts with a White Daisy top layer this time.

A bit before lunch we had a little State of the Union announcement session. We shared about the new products coming, the big price increases on some items, and maybe a sneak peek at some new goodies.

I got back into my own crafting and made these layouts. Since 2 of my most used pocket scrapbooking page designs are being discontinued, I'm making layouts to use as fillers in my albums.

This one is a sketch from Scrapbook Generation. I bought a digital download of theirs years ago and keep forgetting to check it when I need ideas. I'm pleased with how it turned out!

The weekend came to an end, we all packed up our own goodies, packed up our shop, put the tables and chairs away, and put the room back to how it was. We'll be back in a couple weeks for our July 16 Craft Day. Wanna come? Book your spot here!

Products used on these projects: Trimmer Versamat Tweezers Papercrafting Tool Scissors, Adhesive Runner Glue Pen LePen, Cardstocks Fresh Paint Paper Packet, Block Alphabet Slim Alphabet and Crafting Shapes Thin Cuts, Cinnamon Black and Carolina Inks Blocks, MIFYHv5, Dark Red and Light Yellow Triblends, Gold Glitter Gems, and Cassidy Alphabet stampset.

Shop with me today!

Stay up to date with all the fun, join my community!
twitter - instagram - facebook - pinterest - square - moo

Monday, March 1, 2021

March Madness Is Here

Guess what? Time for another new catalog! View the March-April catalog here and contact me to place an order.

Our famous Cardstock Carnival is back. Save up to 30%!

I said-a hip, hop, the hippie, the hippie to the hip hip hop-a you don't stop... Hop along to the newest paper collection Daisy Meadows!

If hopping isn't your thing, perhaps these wings float your boat? S2103 Winged Masterpiece is the new stamp of the month. Ask me how you can get this for $9 or for free!

Calling all pocket scrappers, there's two new kits for you! Shop the Pocket Perfection here.

Well, last year *did* happen, of course there's a paper available to document it. Check out this lovely In This Together suite!

***I'm busy planning out my March/April workshops. Watch this space for details.***

For workshop bookings and products from my studio sales, I accept PayID/Direct Deposit and credit cards. I use Square for credit card payments which incur a processing fee. Contact me to book your spot!

Are you being rewarded for your crafting?
Need more details? Start here.

Are you wanting to do what I do? You can do it!

You've seen all the new products, you've decided which of my brand new workshops to attend and which kits to make, and now it's time to shop. It's so easy to shop with me, simply follow the arrows!

Shop with me today!

Stay up to date with all the fun, join my community!
twitter - instagram - facebook - pinterest - square - moo

Sunday, September 16, 2018

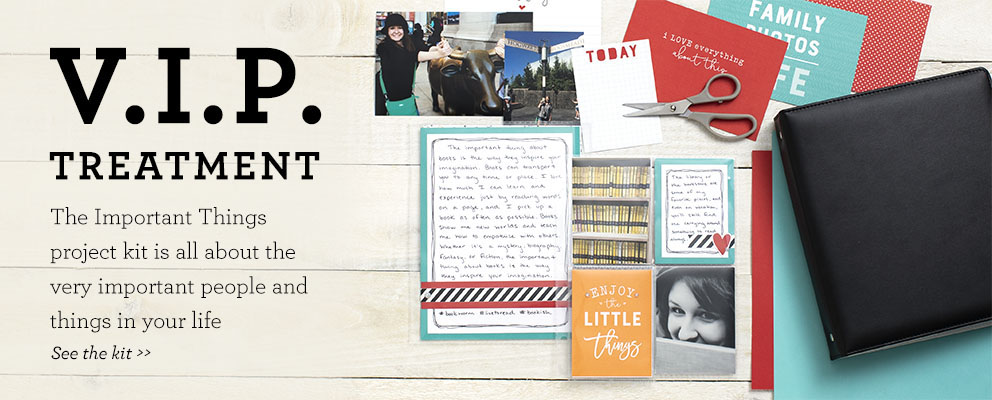
The Important Things

Highlight the unique things that are important to you with The Important Things Everyday Life™ workshop. This workshop shows you how to create eight 6″ × 8″ layouts plus a title page and a closing page for an Everyday Life™ album.


The base kit below provides the basic materials you’ll need, but you’ll need a few additional items to complete the project. If you don’t have these items already, make sure to also add them to your order:
  • Everyday Life™ Album — Black (Z4219)
  • Picture My Life™ Cards — Perfectly Imperfect (X7236E)
  • Hello Pumpkin Washi Tape (Z4214)
  • Silver Glitter Gems (Z4191)
  • Marvy® Uchida® LePen™ Journaling Pen (Z1979)

Shop with me today!


Stay up to date with all the fun, join my community!
twitter - instagram - facebook - pinterest

Wednesday, March 15, 2017

My Scrapbooking Process - Part 3

Update: I'm now using Artisan 5 and Historian 4 as my previous programs finally bit the dust.

Welcome to my new blog series! I'm a scrapbooker and I've never really shared my method or process for how I create pages to fill my albums.

In my previous post, I explained how I use my digital template for sorting, editing, and resizing my images.
Today I'll share how I actually use my template for scrapbooking my edited images!

I've planned my pocket pages, I've resized and printed my images, and now I have a pile of printed photos to get scrapbooked. This is the fun part!

I tend to scrapbook in front of my computer or at my dining table. I get out all my supplies and settle in for a bit of crafting therapy. ;) My essential pocket scrapbooking supplies are: a D-ring album, page protectors, corner rounder, trimmer, pen, adhesive and refills, photos, and picture my life cards. I keep all my goodies in a medium organizer for easy scrapbooking when the mood strikes.
2022 Edit: Medium Organizer shown is no longer available. Try the new Photo Organizer as shown here.

With my supplies at the ready, I can get my pages made. I open up my album and load it with my page protectors (in the same pattern as my digital template). This makes it much easier to get rolling and I'm not hunting high and low for a certain page design!

Now that my pages are in my album, it's time to trim and sort my printed photos. I open up my saved filled template pages and follow the bouncy ball.

I trim my photos to size, round the corners and slip them into the correct pockets as shown in my templates.
Photos, adhesive, trimmer, corner rounder, and scissors are must haves!
Photos cut and put in place before rounding and cards.

Next up is rifling through my collection of cards and overlays and finding just the right ones to suit my photos. Once I'm happy with how my page looks, I flip over and start the next page. I don't follow the one week to a page, or fortnight to a spread idea. Whatever fits on the page and looks good is what I do. One day may be one photo, or it may be 3 spreads. It depends on the photos and the story!

I use a little bit of tape runner to help keep my cards and photos stuck together so they don't wiggle around in the pockets. I also journal as I go instead of waiting til later. My memory isn't what it used to be and waiting to journal at a later date is not best practice. Write the story down now while you are working with the photos!

Voila! A completed page with printed photos and journaling.
From here, it's really rinse lather repeat until done! When I'm out and about at crops, (or my husband has taken over the computer), I simply save my filled template pages to my phone. It doesn't take long to fill my albums with this method and it means that I can catch up on a big backlog of photos in a relatively short amount of time. It also means that when I go to Scrapbook Camps, all the prep work is done ahead of time so I can create during Camp and enjoy myself!

For this 10am-10pm workshop where I took these quick snaps of my process, I had 182 4x6 photos to scrap. That includes the 3x4s I had to cut apart. I have nearly all my 182 photos done and in place. I'm now out of memory protectors and have to order more. (Oh darn, more goodies to arrive!)

I hope you've enjoyed this lil look into how my brain works and how I scrapbook my pocket pages. If you've enjoyed this series, let me know in the comments!

Shop with me today!

Stay up to date with all the fun, join my community!
twitter - instagram - facebook - pinterest - square - moo