I've been busy making more pages for my 2014 album. These are just some of the pieces I've made this week using CTMH products and sketches from CTMH and Scrapbook Generation. Have a look!
I'll start with the pages I've been making for my brother's wedding. I started out with this layout from
Make It From Your Heart Volume 2, retired Ivy Lane papers, retired Swirls Around stampset, retired Ivy Lane stampset, Happy To Be Friends stampset, multiple inks, and retired Ivy Lane complements. Just because items have been retired doesn't mean I don't use them. I bought em, paid good money for em, I'm gonna use em!
 |
| Inks used: blush (retired, replaced with pixie), bamboo, smokey plum, sweet leaf, slate. |
And here's the (almost) finished page. Gotta get the right names and spellings, add some journaling, and maybe some stamping before it's really done. I love the
Kraft cardstock page bases with this layout!
Next is my entrance with my groomsman Dex. As we are the first couple down the aisle, we get our own page. ;) I used a layout from Scrapbook Generation for this one. I also used a mix of retired items (Skylark paper packet and blush ink) and current items (
colonial white cardstock, kraft cardstock,
heart vine and
quatrefoil embossing folders, multiple inks) for this layout. The wedding colors were purple, gray, and accented with burlap so using a blue and green paper packet is a bit challenging!
As you know, I have 2 babies waiting on the other side of eternity. I wrapped my double butterfly pendant around my bridesmaid bouquet (with permission and blessing from the bride) and echoed the pink and blue in my title piece here. A little pink and blue flower for my babes. I like including them in big family functions (this is their uncle's wedding) and have decided to include them in ink here.
See? I used the
Happy To Be Friends stampset with a bunch of inks to make this bit.
 |
| Happy To Be Friends stampset wreath stamped in sweet leaf, flowers stamped in blush, slate, bamboo, glacier, and smokey plum. I love this effect! |
 |
| I kept the embossing folders to 2 designs and used the Chocolate squares as photo mats. |
I had to add some blingy bits to the flowers so I dug through my stash to find some sequins and glitter gems. Now it feels done!
 |
| Julia's flower is in blush (retired color) and Evan's flower is in glacier (new color). |
The finished page with pictures and journaling!
For the rest of the bridal party, I squished em all onto the same page, just because I can. ;) Another Scrapbook Generation sketch, Skylark papers,
quatrefoil and
woodgrain embossing folders and inking up the embossed bits. I'm really enjoying the collage pages from Scrapbook Generation!
I've started the page for my new sister's entrance and haven't printed the pictures (yet). I'll hopefully get this layout done this week.
A couple weeks back I got these wooden letters from spotlight and covered them using
Hopscotch paper and
liquid glass. I finally got around to sticking them up on my office wall with good old blutack!
I decided to challenge a new mate to a color challenge the other night using these colors.
I used them to finish off a card design we learned at Convention back in October. (Yes, I have had the pieces for this card cut and waiting since October!) This card also features the
Happy To Be Friends stampset and flaxen smoothie thistle and glacier
inks.
One of the facebook groups I'm in is doing page challenges. This is one of the current challenges from
Make It From Your Heart Volume 1. I've embossed the purple strip with our
Damask embossing folder. Not sure which wedding photos I'll use on it yet. The mint bit is a place holder for a 5x7 photo so I don't forget.
I'm toying with ideas for save the date cards. This is the idea that popped in my head the other night. If you're getting married soon and are looking for unique save the dates, invites, or thank you cards, I can help whip up something that suits your taste and colors. With a palette of 42 colors (including 2 shades of white), and a mix of alphabet stampsets, the options are nearly endless.
And finally, the layout I finished yesterday before heading to the pool for a looooong soak. This is for formal wedding party shots, it's also another scrapbook generation sketch.
I decided to use the
Woodgrain embossing folder on 2 squares to add some visual interest, then decide some stamping would help too. The tree and heart images are from September 2014's stamp of the month. Never pass up the SOTM, you never know when I'll pull out an older design and use it again!
 |
| I decided to add some hearts in smokey plum, sweet leaf, bamboo, desert sand, and glacier inks. |
This is the layout design I'm teaching in February's Scrap Your Stash sessions. I did it first in Heartstrings, then in Ivy Lane as I loved it so much! There's space for 12 photos on this layout. 12!
 |
| 12 photos spaces: four 2x2, one 4x6, five 3x4, two 3x5. |
The smaller rectangles are photo mats for 2x2 photos. They look a bit like polaroids to me. I cut a 2x2 square, lined it up on each mat, and used my micro tip scissors to lightly score around as a guide for where to place the photos later. If you embiggen this one you'll see a faint score line.
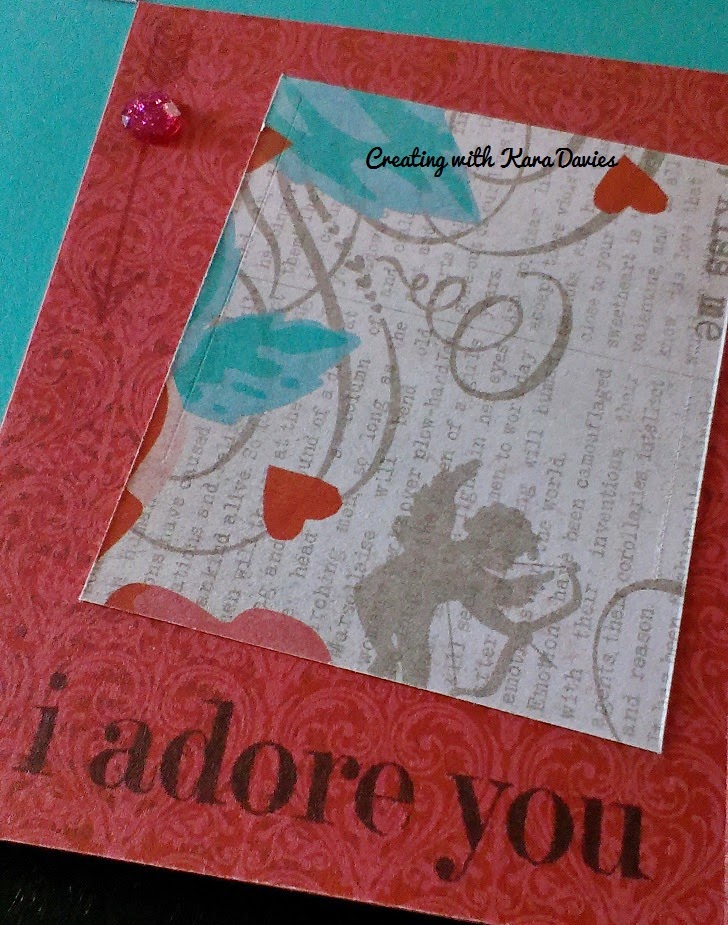 |
| I stamped this one with the Year Noted arrow stamp in ruby ink and i adore you (retired stamp) in black. |
 |
| Love You is from Happy To Be Friends and I stamped it in blush. |
Now for the Ivy Lane version! I chose to use B&T paper for the base of these pages instead of cardstock. You don't have to use cardstock as a base, you can use paper!
 |
| Space for 12 photos, yes 12! |
Here you can see the outline for the 2x2 photo that I mentioned earlier. I added some pen stitching just for grins.
This is my favorite bit on the page. The embossing, the sticker, the dovetailed bits,
*swoon*.
I used the woodgrain and damask folders for these parts. I ran the woodgrain through my cuttlebug and the damask I just used my metal waterbottle to lightly press the design into my cardstock. It's a nice change of texture for the page.
Love this 12 photo layout? Want to know how to make it? Guess what, I'm teaching them during
Scrap Your Stash! Want to come to a Scrap Your Stash session?
Let me know!


