Showing posts with label ScrapYourStash. Show all posts

Saturday, July 23, 2016

Saturday Soundtrack

Wherever you are in the world, if you hadn't heard, Queensland is in a heat snap. It's winter, we've got 8 weeks or more to go before our spring has even a chance of arriving. Go home Queensland, you're drunk. :p (We enjoy our brief winter and this summer heat in winter is not appreciated!)

Today I'm participating in an online crop with the SG Scrap Squad from Scrapbook Generation. (A lil variety in scrapping sketches and challenges never hurts!) These are some of the songs I've got cranked up while I scrap. :)


What do you listen to when you craft? Comment below by 7pm August 1st 2016 for a chance to win a free Scrap Your Stash session!

Shop with me today!


What can I help you create today?
Stay up to date with all the fun, join my community!

twitter - instagram - facebook - pinterest

Friday, March 4, 2016

Pocket Scrapbooking

Pocket scrapbooking is all the rage these days. You'll see it in stores, on blogs, instagram, pinterest, and in my own albums.

You may be wondering "what is it?" Put simply, pocket scrapbooking is a simple style/method of scrapbooking. You have an album, a couple sets of pocket pages, a kit of pocket cards, and photos. You put the pages in the album, then your photos in the pages, and finish off with some pocket cards and journaling.
That's it! Scrapbooking. Simple. Quick. Streamlined. Easy. You can do it! Of course, if you want to embellish your cards, you can. Stickers, shimmer trim, twine, sequins, you name it.

There's multiple sizes of pocket pages and albums with Close to my Heart. The main size is 12x12 pages with a handful of page designs (featuring 3x4 and 4x6 pockets). This size is best for doing full albums for any theme, or mixing with traditional pages within an album (which is what I do).
These pages come from the Memory Protector Variety Pack.

There's also 4x4, 4x6 and 6x8 designs! These are better for smaller projects or gifts. Think birthday parties, thank you gifts for bridal party members or parents, brag books, making into recipe books, etc. They're also good for business people looking to store their samples of fabric, nail wraps (like Jamberry), or other goods. The list is endless!

One of my sister consultants out in WA uses the 4x4 Instalife album and pages to store alongside her essential oils. What a clever use for a small album, right?


This 4x6 My Creations™ Mini Book was turned into a Christmas gift for my husband featuring pictures of a Lego exhibition he was presenting at. (You can see the entire project here.) I tucked a Lego gift card in the back before wrapping it up.

My Creations™ Black Mini Book
These little wirebound hardcover books are not expandable in the traditional sense (you can't add pages). What you CAN do is add a variety of Flip Flaps to expand the capacity!

The newest size is 6x8. The Everyday Life album cover and pocket pages feature everything you love about pocket scrapping in a nice portable size. I've added a few pocket pages to my planner to hold treasured photos. You can also turn it into a photo album on its own! Simply purchase an album cover, 4x6 and/or 3x4 pocket pages, a Picture My Life card kit and you're ready to go to town!

4x6 pocket pages
4x6 and 3x4 pocket pages. I store some planner stickers in my 4x6 pocket.
3x4 pocket pages.

Love the idea of pocket scrapbooking? Never tried it and want to see it in person? Want to meet new friends? Come along and enjoy a fun morning in my studio! I'll be showing all the different Picture My Life options and you get to take some home!

Bookings are essential, and close 7pm March 5th.


Contact me today to secure your place for this exclusive workshop!

Shop with me today!


What can I help you create today?
Stay up to date with all the fun, join my community!
twitter - instagram - facebook - pinterest

Friday, July 17, 2015

Flash Sale!

Love CTMH, love scrapbooking, and just don't have the time to scrapbook on paper? Try Studio J! What is Studio J you ask? It's the digital scrapbook solution from Close to my Heart! Right now, there's a flash sale on!

From 16 July 2015, 1:00 am AEST to 1 August 2015, 9:00 am AEST, all layouts in Studio J are only $7.50 AUD each! What a bargain!
Do you have an account full of Studio J® layouts waiting to be printed? How about a big photo order you keep meaning to make? Well, now is the time to log in to Studio J and order all your layouts and photos!

It's easy to scrap digitally with StudioJ. Just pop over to my website!
Click Products, then Studio J
Once you're here, just follow the prompts and start exploring!
You've taken the photos. now keep the memories.™ 
Close To My Heart's online design software, Studio J®, helps you easily create two-page layouts using our foundational scrapbook patterns, exclusive color palette, and themed designs all delivered in 12" × 12" custom prints ready for your albums. It's a snap! So what are you waiting for? Enter the studio now to discover the fun of creating beautiful memories in Studio J! Or for more information, visit the Studio J FAQ.


Shop with me today!


Stay up to date with all the fun, join my community!
twitter - instagram - facebook - pinterest

Monday, January 26, 2015

Latest artwork

I've been busy making more pages for my 2014 album. These are just some of the pieces I've made this week using CTMH products and sketches from CTMH and Scrapbook Generation. Have a look!


I'll start with the pages I've been making for my brother's wedding. I started out with this layout from Make It From Your Heart Volume 2, retired Ivy Lane papers, retired Swirls Around stampset, retired Ivy Lane stampset, Happy To Be Friends stampset, multiple inks, and retired Ivy Lane complements. Just because items have been retired doesn't mean I don't use them. I bought em, paid good money for em, I'm gonna use em!
Inks used: blush (retired, replaced with pixie), bamboo, smokey plum, sweet leaf, slate.
And here's the (almost) finished page. Gotta get the right names and spellings, add some journaling, and maybe some stamping before it's really done. I love the Kraft cardstock page bases with this layout!

Next is my entrance with my groomsman Dex. As we are the first couple down the aisle, we get our own page. ;) I used a layout from Scrapbook Generation for this one. I also used a mix of retired items (Skylark paper packet and blush ink) and current items (colonial white cardstock, kraft cardstock, heart vine and quatrefoil embossing folders, multiple inks) for this layout. The wedding colors were purple, gray, and accented with burlap so using a blue and green paper packet is a bit challenging!
 As you know, I have 2 babies waiting on the other side of eternity. I wrapped my double butterfly pendant around my bridesmaid bouquet (with permission and blessing from the bride) and echoed the pink and blue in my title piece here. A little pink and blue flower for my babes. I like including them in big family functions (this is their uncle's wedding) and have decided to include them in ink here.
See? I used the Happy To Be Friends stampset with a bunch of inks to make this bit.
Happy To Be Friends stampset wreath stamped in sweet leaf, flowers stamped in blush, slate, bamboo, glacier, and smokey plum. I love this effect!
I kept the embossing folders to 2 designs and used the Chocolate squares as photo mats.
I had to add some blingy bits to the flowers so I dug through my stash to find some sequins and glitter gems. Now it feels done!
Julia's flower is in blush (retired color) and Evan's flower is in glacier (new color).
 The finished page with pictures and journaling!

For the rest of the bridal party, I squished em all onto the same page, just because I can. ;) Another Scrapbook Generation sketch, Skylark papers, quatrefoil and woodgrain embossing folders and inking up the embossed bits. I'm really enjoying the collage pages from Scrapbook Generation!

I've started the page for my new sister's entrance and haven't printed the pictures (yet). I'll hopefully get this layout done this week.

A couple weeks back I got these wooden letters from spotlight and covered them using Hopscotch paper and liquid glass. I finally got around to sticking them up on my office wall with good old blutack!

I decided to challenge a new mate to a color challenge the other night using these colors.
I used them to finish off a card design we learned at Convention back in October. (Yes, I have had the pieces for this card cut and waiting since October!) This card also features the Happy To Be Friends stampset and flaxen smoothie thistle and glacier inks.

One of the facebook groups I'm in is doing page challenges. This is one of the current challenges from Make It From Your Heart Volume 1. I've embossed the purple strip with our Damask embossing folder. Not sure which wedding photos I'll use on it yet. The mint bit is a place holder for a 5x7 photo so I don't forget.

I'm toying with ideas for save the date cards. This is the idea that popped in my head the other night. If you're getting married soon and are looking for unique save the dates, invites, or thank you cards, I can help whip up something that suits your taste and colors. With a palette of 42 colors (including 2 shades of white), and a mix of alphabet stampsets, the options are nearly endless.

And finally, the layout I finished yesterday before heading to the pool for a looooong soak. This is for formal wedding party shots, it's also another scrapbook generation sketch.
I decided to use the Woodgrain embossing folder on 2 squares to add some visual interest, then decide some stamping would help too. The tree and heart images are from September 2014's stamp of the month. Never pass up the SOTM, you never know when I'll pull out an older design and use it again!
I decided to add some hearts in smokey plum, sweet leaf, bamboo, desert sand, and glacier inks.

This is the layout design I'm teaching in February's Scrap Your Stash sessions. I did it first in Heartstrings, then in Ivy Lane as I loved it so much! There's space for 12 photos on this layout. 12!
12 photos spaces: four 2x2, one 4x6, five 3x4, two 3x5.
The smaller rectangles are photo mats for 2x2 photos. They look a bit like polaroids to me. I cut a 2x2 square, lined it up on each mat, and used my micro tip scissors to lightly score around as a guide for where to place the photos later. If you embiggen this one you'll see a faint score line.
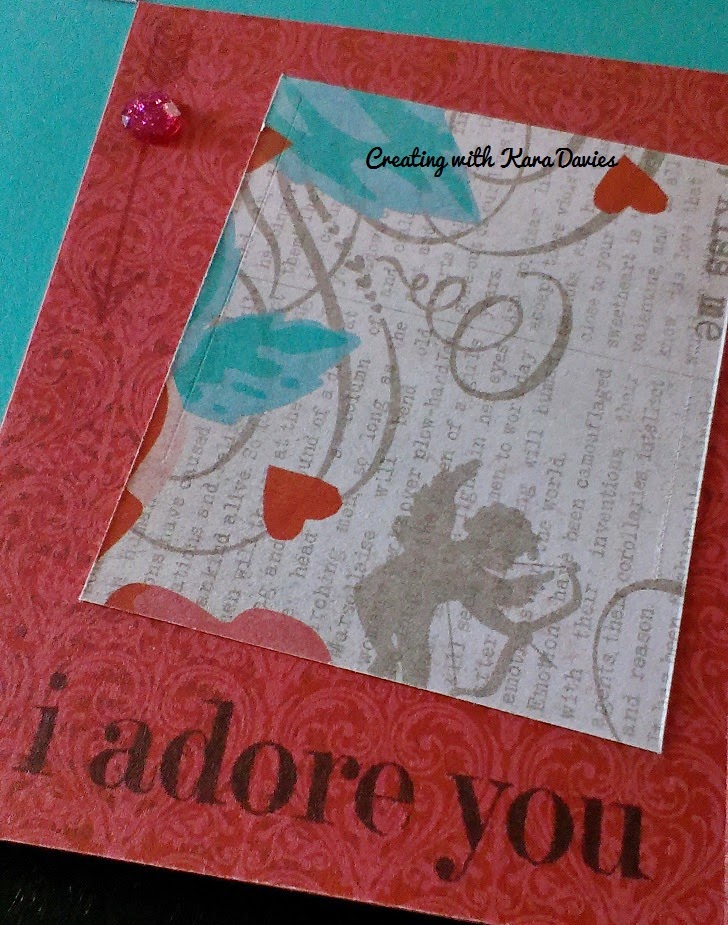
I stamped this one with the Year Noted arrow stamp in ruby ink and i adore you (retired stamp) in black.
Love You is from Happy To Be Friends and I stamped it in blush.
Heart embossing folder, and lagoon inked edges.
Now for the Ivy Lane version! I chose to use B&T paper for the base of these pages instead of cardstock. You don't have to use cardstock as a base, you can use paper!
Space for 12 photos, yes 12!
Here you can see the outline for the 2x2 photo that I mentioned earlier. I added some pen stitching just for grins.
 This is my favorite bit on the page. The embossing, the sticker, the dovetailed bits, *swoon*.
I used the woodgrain and damask folders for these parts. I ran the woodgrain through my cuttlebug and the damask I just used my metal waterbottle to lightly press the design into my cardstock. It's a nice change of texture for the page.

Love this 12 photo layout? Want to know how to make it? Guess what, I'm teaching them during Scrap Your Stash! Want to come to a Scrap Your Stash session? Let me know!


Tuesday, September 9, 2014

Apologies

Tomorrow's 1-3pm Scrap Your Stash has been canceled due to unforseen circumstances.

My apologies. Scrap Your Stash is on for next week!


Wednesday, July 9, 2014

Scrapping My Stash

As you all know, two weeks ago I became an Australian citizen... and that means I've got pages to do. So far, I'm up to 14 pages. Yes, 14. This is nothing for an event. For my wedding day, I have 2 full 12x12 strap-bound albums, like bursting at the seams full. It's crazy.

For all the layouts, I've used designs found in the Reflections how to book. I've used assorted colors of cardstock for the base of each page, the Sarita range (about 2 paper packs plus lots of scraps from my Sarita WOTG kit, and assorted complements), the Surecut™ Deluxe Craft Paper Trimmer, and both bonding memories glue pens (glue and pen). All stamping and journaling are still to come. I wanted to get these pages cut and stuck down first.

Pardon the poor quality pictures, I took these last night just before I went to bed. I'll re-shoot soon.
Finding the venue and our seats.
My group being called up to do our oath.
My group and my official pictures with the Deputy Mayor.
Me and my cheer squad.
A copy of my certificate will go on this right hand page.
All smiles and a few of the other groups doing their oath.
One last pretty picture with my husband, and the after party. Pizza and cake at my inlaws house.
How good does this look?! So simple and so easy. The hardest part was choosing which layouts I wanted to use with which photos! I absolutely love Sarita and it's retiring. Love what I've created here with this gorgeous paper range? You'd better get in quick before Sarita is no more. Available only til July 31st or until sold out.

Want to pick up your own packet of Sarita? Shop with me today!