Showing posts with label WOTG. Show all posts

Wednesday, August 20, 2014

Upcoming themes

Good evening my lovelies!

Now that the new Annual Inspirations Book is here, I've made up my list of monthly themes for my workshops. Have a look!

September
New Techniques: Cardmaking Basics with wet & dry embossing - featuring the Ranger Clear embossing powder and 2 Embossing Folders. September 13 
Changed! Brushed WOTG is being moved to 2015
October
Snowhaven Cardmaking
Christmas craft: Cut Above™ Holiday Treat Bag Kit
November
Yuletide Carol WOTG
Christmas craft: Cut Above™ Christmas Card Kit
December
Chalk It Up WOTG
Last minute Christmas craft: Cut Above™ Holiday Card Kit
January 2015
Wanderful WOTG
Post Christmas Catch Up: My Crush™ Holiday Happenings
Post Christmas Catch Up: Picture My Life™ Pear & Partridge

I'm in the process of finalizing my workshop dates and costs so keep an eye out. Check my Events tab regularly!


Saturday, April 12, 2014

Ivy Lane part 2

I. love. this. kit.

The colors. The paper patterns. The ease of cutting and assembling. The finished results. Have a look!

This is what the instructions look like.
This is how I interpreted them.
Tada! Note how the instructions state where to put Cricut cut stamped images. Note the lack of Cricut cut stamped images on my layout. You don't *need* to have a Cricut to do these WOTG kits.

This is the second layout mentioned in the instructions. (You'll need the Reflections book for the layout cutting and assembly directions.)
Isn't it lovely? I've not planned which photos I want to use here yet so I've left the stamping and further embellishing for the moment.

After I finished these two layouts, I had a heap of leftover paper scraps and strips. I decided to use them to make the current April bonus challenge layout. I added two sheets of Bamboo cardstock to use for the bases, everything else was leftover from the 2 above layouts.
You really do get a lot out of this kit. 6 12x12 traditional pages so far.
I'm stunned at how much I've still got leftover! A full sheet of White Daisy cardstock, a mostly full sheet of Ivy Lane Green cardstock, varying strips and scraps of the B&T papers. Plenty of scraps left to make some cards. What else can I make from this pile?

I'm thinking some cards are in order. Stay tuned...


Wednesday, April 9, 2014

Ivy Lane

I started the Ivy Lane WOTG Scrapbooking kit ($42.00) layouts last night. After some flubs (gluing down the wrong bit in the wrong spot, twice) and some sleep, I'm getting back into it.

This kit is gorgeous. Right away I could tell it would be a fun one to assemble. The colors speak to me of wine country tours or a girls weekend away.

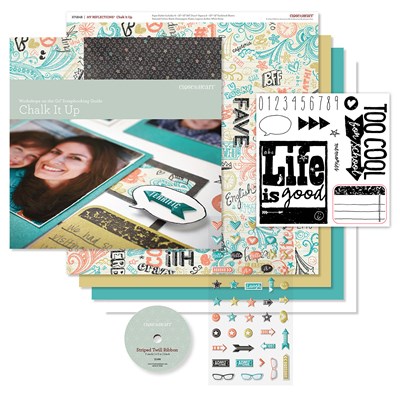
Just look at all the goodies in here!

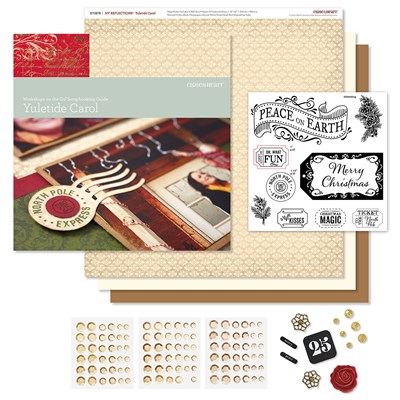
Included in the kit is this exclusive stampset (worth $24.00!). This cannot be bought on its own. Only way to get it is to buy the kit. With the kit at $42.00, it's well worth buying!
Workshops on the Go™ Ivy Lane Scrapbooking Kit Contents:
Ivy Lane Paper Packet
My Acrylix™ Ivy Lane Workshop Stamp Set (D-size)
Cardstock Sheets (2 kraft, 2 White Daisy)
Ivy Lane Assortment
Purple Glitter Gems
Instructional Brochure
Featured Colors: Bamboo, Blush, Hollyhock, Ivy Lane Green, Ivy Lane Purple

Follow the included step-by-step instructions to create the two-page layout featured in the workshop guide. The layout pattern is a Jeanette Lynton original created exclusively for this workshop. Then use your remaining materials and online tips to create an additional layout, shown in the guide.
Some basic tools you may already have, such as inks, stamp blocks, or how-to books, are needed to complete these projects.

These are the B&T papers from the Paper Packet.
The reverse sides. Gorgeous!
This cardstock is just lovely!
Left hand page of the layout.
Right hand page of the layout. Stamping and embellishments to come!
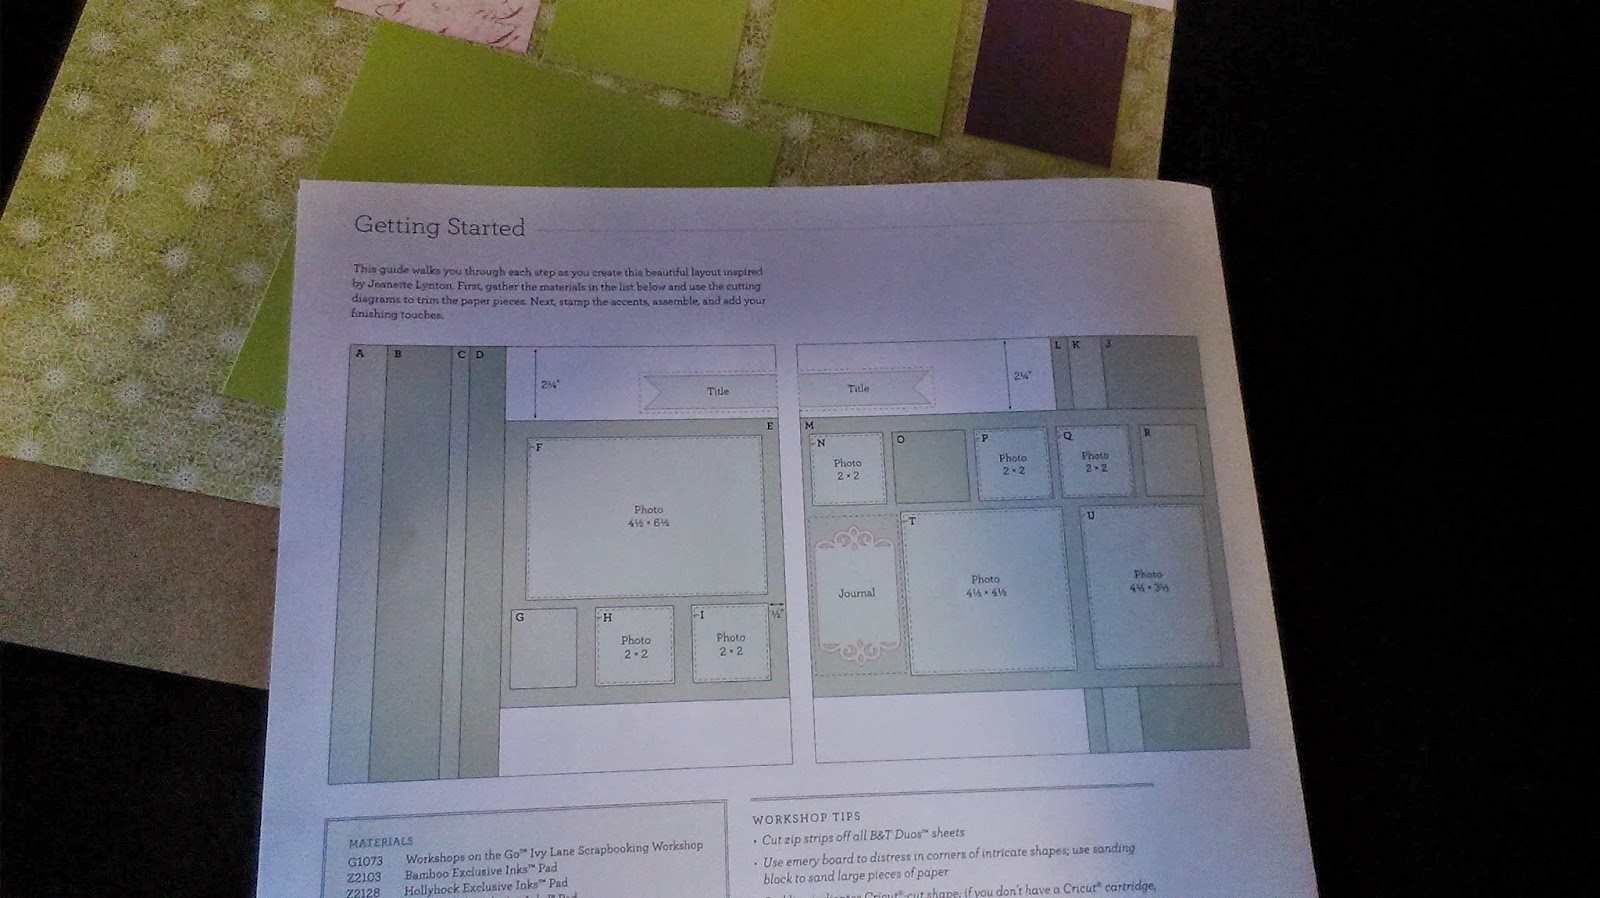
You get instructions! So clear and easy to do.
The list of materials needed to complete these layouts.
Helpful hints. :)
In order to maximize the papers, you get cutting guides like this for every piece of paper and cardstock.
This kit is such fabulous value. For $42.00 you get enough papers, cardstocks, embellishments, instructions (including the cutting guide), and the stampset. To buy it all separately, you'd be paying easily over $51. Not to mention you don't get this exclusive stampset. It's worth it to get the kit, full stop.

I love this kit! Can't wait to get inky and finish it off!


Sunday, March 9, 2014

March Ordering

Good morning my lovelies!

I'm placing my next order on March 28. If you want to save a bit on shipping, read on!

Please let me know what you want to order and I can add it onto mine. Remember, full payment for your items must be in my account by 7pm March 28 if you want to join my order. Call or email me to add your selections!

Don't want to wait for me? You can order your goodies from my website now and have them shipped straight to your door.

**Good news!** Shipping time has been improved and some of my dear customers have been receiving their orders in just over a week! (It used to be just over 2 weeks!) That's nearly instant gratification!

Just a reminder, in March my SYS workshops are using the following products: Sarita paper packet and my stickease, Laughing Lola paper packet and Chipboard complements.

In April and May, my regular workshops are using the following kits: Ivy Lane Cardmaking Kit, Skylark WOTG Scrapbooking kit, and the Ivy Lane WOTG Scrapbooking Kit.

Why not get in early and have your materials all sorted and ready to go? First person in with their selections and full payment will get a prize (valued at $24AUD)! Curious? Contact me for details!

Thank you for supporting my business. It means the world to me!

Happy ordering!


Tuesday, February 18, 2014

More My Reflections

I came up with these page challenges while watching the ice dancing and the bobsledding last night. I miss my winter!

Now to find pictures for these layouts...

Tommy challenge pages - materials used: Tommy WOTG kit (retiring item), Tombow adhesive, 12" trimmer, various Exclusive Inks, micro tip scissors, My Reflections book.
LH - Reflections pg 15
RH Reflections pg 110
Laughing Lola challege pages - materials used: Laughing Lola WOTG kit (retiring item), Laughing Lola complements, Tombow adhesive, 12" trimmer, various Exclusive Inks, micro tip scissors, My Reflections book, teal shimmer trim, glue dots.
LH - Reflections pg 62
Finished! A few mats under my picture and some embellishments really perk this page up.
RH - Reflections pg 79
Completed full spread.
Are you coming to my Studio Open Day? Plenty of spaces still available! These will be on display for you to see first hand. Like what you see? You can place an order on the spot! :)


Sunday, February 16, 2014

Page Reveals

I'm loving this how-to book. 7 pages done in a week following the recipes!

You've already seen my first few pages using Skylark and For Always. Well, there's now more! Edit: I've added links to all the products used for your convenience.

Skylark challege pages - materials used: Skylark WOTG kit (brand new item), Skylark Picture My Life card kit (fussy cut by hand), Chocolate and Lagoon cardstocks, Tombow adhesive, 12" trimmer, Chocolate Exclusive Ink, micro tip scissors, My Reflections book.
Both pages based on Reflections pg 70.
For Always page - materials used: For Always WOTG kit (discontinued), For Always My Stickease (discontinued), Tombow adhesive, 12" trimmer, My Reflections book, Black/White/Silver shimmer cardstocks (from my stash).
Reflections pg 73
Sarita challege pages - materials used: Sarita Paper Packet, Tombow adhesive, 12" trimmer, Chocolate Exclusive Ink, micro tip scissors, My Reflections book.
LH - Reflections pg 56
RH - Reflections pg 41
And these are my Surf's Up pages. Notice that I used some of the 3x4 Surf's Up Picture My Life cards on this layout. They aren't just for use in PML albums! They can be used for cards and for off the page projects, and as accents in traditional albums like you see here.

Surf's Up challege pages - materials used: Surf's Up WOTG kit, Surf's Up Picture My Life card kit (fussy cut by hand), Tombow adhesive, 12" trimmer, Chocolate Exclusive Ink, micro tip scissors, My Reflections book.
LH - Reflections pg 84
RH - Reflections pg 125
These pages seriously didn't take long to make. The most time consuming part was cutting everything and sticking it down! This how-to book doesn't have to be used with Close To My Heart papers. Neither do the instructions featured in our Workshop On The Go kits! I'll dig up some of my older papers and do a side by side comparison using the same layouts.
*STUDIO OPEN DAY*
I'm excited to see how this collection of recipes is used by you, my lovely readers.

I'm opening up my studio this Thursday, February 20th from 10am onwards. Bring some of your favorite papers, cardstock/pages, your trimmer, and adhesive, and I'll show you how this featured idea works. Have a cuppa, look at the new Ideas Book, check out the Picture My Life range, and ask any questions you have about Close To My Heart.

Email or ring me to let me know you're coming. I'm excited to see you!